一、文章目的 本文以添加新模块”ngx_http_stub_status_module”为例介绍Nginx如果在不停止服务的情况下进行升级。
二、Nginx升级 先查看一下目前现在模块:
1
2
3
4
5
6
[root@localhost sbin]# ./nginx -V nginx version: nginx/1.8.1 built by gcc 4.8.5 20150623 (Red Hat 4.8.5-4) (GCC) built with OpenSSL 1.0.1e-fips 11 Feb 2013 TLS SNI support enabled configure arguments: --with-pcre=../pcre-8.38 --with-zlib=../zlib-1.2.8 --with-http_gzip_static_module --with-http_ssl_module --add-module=../nginx_tcp_proxy_module/ --add-module=../nginx_upstream_check_module/ --add-module=../nginx-module-vts/
进入到nginx源码目录(或者直接从网络上下载。参见博文[ Nginx在CentOS7上源码编译安装 ]),编译时增加所需添加的模块:
1
2
3
[root@localhost nginx-1.8.1]# cd ~/nginx-1.8.1 [root@localhost nginx-1.8.1]# ./configure --with-pcre=../pcre-8.38 --with-zlib=../zlib-1.2.8 --with-http_gzip_static_module --with-http_stub_status_module --with-http_ssl_module --add-module=../nginx_tcp_proxy_module/ \--add-module=../nginx_upstream_check_module/ \--add-module=../nginx-module-vts/ [root@localhost nginx-1.8.1]# make
将编译出的objs目录下及nginx运行文件直接copy到原nginx目录(注意备份):
1
2
3
4
5
6
7
8
9
10
11
12
13
14
15
16
[root@localhost nginx-1.8.1]# mv /usr/local/nginx/sbin/nginx /usr/local/nginx/sbin/nginx.old [root@localhost nginx-1.8.1]# cp objs/nginx /usr/local/nginx/sbin/ [root@localhost nginx-1.8.1]# make upgrade /usr/local/nginx/sbin/nginx -t nginx: the configuration file /usr/local/nginx/conf/nginx.conf syntax is ok nginx: configuration file /usr/local/nginx/conf/nginx.conf test is successful kill -USR2 `cat /usr/local/nginx/logs/nginx.pid` sleep 1 test -f /usr/local/nginx/logs/nginx.pid.oldbin kill -QUIT `cat /usr/local/nginx/logs/nginx.pid.oldbin` [root@localhost sbin]# ./nginx -V nginx version: nginx/1.8.1 built by gcc 4.8.5 20150623 (Red Hat 4.8.5-4) (GCC) built with OpenSSL 1.0.1e-fips 11 Feb 2013 TLS SNI support enabled configure arguments: --with-pcre=../pcre-8.38 --with-zlib=../zlib-1.2.8 --with-http_gzip_static_module --with-http_stub_status_module --with-http_ssl_module --add-module=../nginx_tcp_proxy_module/ --add-module=../nginx_upstream_check_module/ --add-module=../nginx-module-vts/
从以上的输出信息来看,nginx已经成功添加了http_stub_status_module模块。接下来,我们进行验证。
验证ngx_http_stub_status_module模块是否生效 在conf/nginx.conf的server节点下添加
1
2
3
location /status { stub_status; }
重新load一下nginx配置
1
2
3
[root@localhost sbin]# ./nginx -t;./nginx -s reload nginx: the configuration file /usr/local/nginx/conf/nginx.conf syntax is ok nginx: configuration file /usr/local/nginx/conf/nginx.conf test is successful
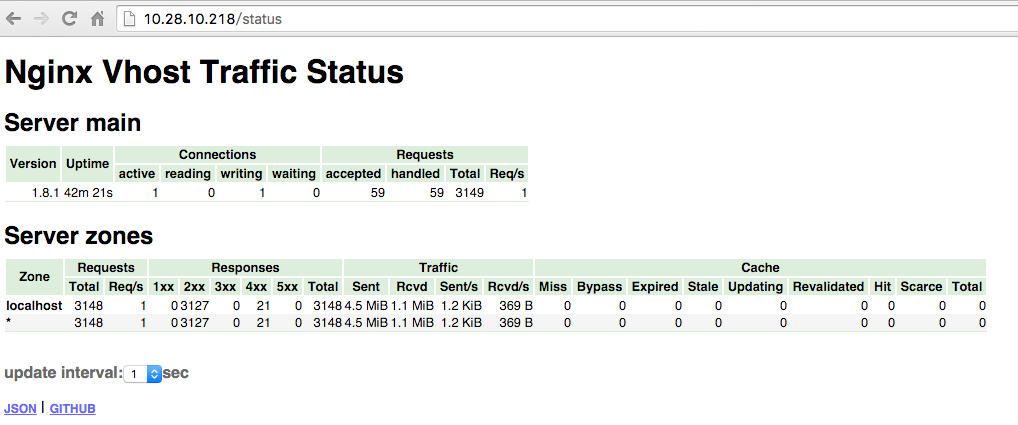
然后通过浏览器访问http://10.28.10.218/status 就可以看到nginx的运行状态已经通过界面的方式显示出来了。
由于http_stub_status_module模块监控的状态项非常有限,建议使用nginx-module-vts模块对nginx进行更全面的运行状态监控。
nginx.conf
1
2
3
4
5
6
7
8
9
http { vhost_traffic_status_zone; server { location /vts { vhost_traffic_status_display; vhost_traffic_status_display_format html; } } }
三、提高nginx监控页面的安全性 由于nginx的运行状态为非常重要的数据,所以只允许有特定权限的人员才能有权访问,所以我们可以通过http_auth_basic_module模块来进行身份的验证。更为关键的是http_auth_basic_module模块默认已安装。
通过“yum provides *bin/htpasswd”查看哪个库中有htpasswd命令,安装账户生成命令htpasswd,并添加一个用户admin
1
2
3
4
5
6
7
8
9
10
11
12
13
14
15
16
17
18
19
20
21
[root@localhost nginx-1.8.1]# yum provides \*bin/htpasswd 已加载插件:fastestmirror Loading mirror speeds from cached hostfile * base: mirrors.sina.cn * epel: ftp.cuhk.edu.hk * extras: mirrors.sina.cn * updates: mirrors.sina.cn base/7/x86_64/filelists_db | 6.2 MB 00:00:01 httpd-tools-2.4.6-40.el7.centos.x86_64 : Tools for use with the Apache HTTP Server 源 :base 匹配来源: 文件名 :/usr/bin/htpasswd [root@localhost nginx-1.8.1]# yum install httpd-tools [root@localhost nginx-1.8.1]# whereis htpasswd //查看是否安装成功 htpasswd: /usr/bin/htpasswd /usr/share/man/man1/htpasswd.1.gz [root@localhost nginx]# htpasswd -c ./nginx.auth admin //在nginx目录下会生成一个nginx.auth文件来存储账户信息,第二次添加用户就不需要加-c的参数了 New password: Re-type new password: Adding password for user admin
在conf/nginx.conf的location status节点内添加以下身份验证配置
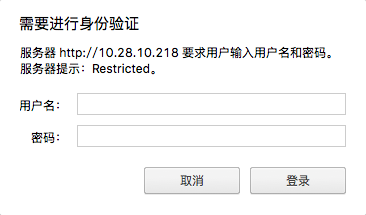
1
2
3
4
5
6
7
8
9
10
11
http { vhost_traffic_status_zone; server { location /vts { auth_basic "Restricted"; auth_basic_user_file ../nginx.auth; vhost_traffic_status_display; vhost_traffic_status_display_format html; } } }
重新热更新一下配置,再次通过浏览器访问时就会弹框提示你输入用户名和密码了。
1
2
3
[root@localhost sbin]# ./nginx -t;./nginx -s reload nginx: the configuration file /usr/local/nginx/conf/nginx.conf syntax is ok nginx: configuration file /usr/local/nginx/conf/nginx.conf test is successful
观点仅代表自己,期待你的留言。